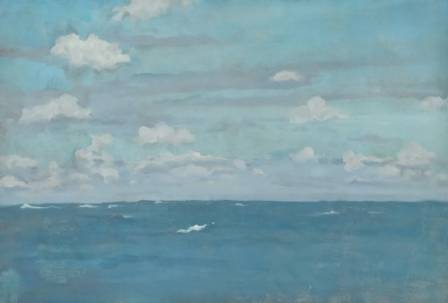
Depicting the vastness of the sea is a foundational skill for any landscape artist. While the movement of water may appear intricate, capturing it on canvas is a manageable process when approached through a structured, layered method. This tutorial provides accessible techniques designed to help painters of all levels create a dynamic and convincing ocean scene using acrylics.
Foundational Preparation and Sky Composition
The initial phase of any seascape involves establishing the atmosphere and background. Begin by preparing three distinct tonal mixtures: a warm cream, a soft light aqua, and a deeper, more saturated aqua. When mixing, start with small portions of pigment to ensure you achieve the desired balance before committing to larger quantities.
Apply these hues to the upper portion of your canvas to form the sky, working from the lightest shade at the bottom to the darkest at the top. To achieve a seamless transition, use a dry blending brush and employ a rapid, circular wrist motion. A light touch is essential here; barely grazing the surface of the canvas allows the acrylics to merge into a soft gradient without becoming muddy.
Establishing the Horizon and Water Texture
Once the sky is set, focus shifts to the water’s surface. Define your horizon line using your deepest blue mixture. Immediately below this, apply a secondary, slightly lighter band of color, followed by a layer of muted green. This creates the natural progression of light often seen in deep water. To introduce realistic motion, mix a turquoise-tinted gray by combining your mid-tone blue with small amounts of black and white.
Use this gray to suggest the rhythmic pattern of ripples. Rather than painting perfectly horizontal lines, apply them at a slight angle to mimic the natural ebb and flow of the tide. In the foreground, use the same gray to block in the shadowy undersides of what will eventually become cresting waves. This establishes the structural "bones" of your sea before adding the brighter surface details.
Developing Depth through Layering
The complexity of a seascape is built through successive layers. Surround your foreground wave shadows with a pale blue, allowing the color to bleed slightly into the shaded areas. For additional depth, introduce a vibrant light green—mixed from yellow, blue, and white—around the wave structures. This represents the translucent quality of water as it thins and catches the light before breaking.
Continue to add small ripples in the distance using your gray mixture. This step transforms the flat foundational colors into a recognizable landscape. By breaking the image down into these simple tonal shapes, the seemingly difficult task of painting water becomes a series of logical, achievable steps.
Adding Seafoam and Final Details
The final character of the ocean is defined by the white foam and highlights that dance on the surface. Using a clean white paint, stipple the tops of the breaking waves and follow the edges of your previously painted ripples. To replicate the organic appearance of seafoam, create small, irregular shapes—resembling clusters of diamonds or circles—on the water's surface. Ensure these shapes decrease in size as they recede toward the horizon to maintain proper perspective.
To complete the piece, refine the shadows at the base of your waves with a deeper gray to enhance the three-dimensional effect. Finally, use a detail brush to add delicate white streaks along the wave faces and surface ripples. Whether you prefer a soft, impressionistic finish or a sharp, realistic look, these final highlights are what truly bring the ocean to life.