When departing from an airport with tower control, begin by turning on the master switch and one radio to listen to the Automated Terminal Information Service (ATIS). This recording provides current weather and operational information for your departure airport.
Once you have recorded the necessary details, you may turn off the radio and master switch and proceed with the Before Starting Engine and Starting Engine checklists.
Tip:
Cockpit noise increases significantly after engine start. Once the engine is running smoothly, it’s a good time to put on your headset.
Taxi and Engine Run-Up
Taxiing Standards (Practical Test):
Call ground control to request clearance for taxiing. This communication procedure will be explained in detail in Flight Two.
Once cleared, release the brakes by pressing the top part of the rudder pedals with your toes. As the aircraft begins to move, apply even pressure to verify the brakes and slightly compress the nose strut to disengage the nose wheel centering device.
Steering on the ground is controlled by pushing the lower part of the rudder pedals with your heels to turn the nose wheel. Each top-half pedal operates an independent brake on the main wheels. Unequal pressure results in differential braking, which helps with sharper turns but should be used carefully.
Tip:
Your main challenge will be coordinating footwork—resist the urge to turn the yoke to steer on the ground.
Follow the centerline (yellow line) to reach the runway. Choose a suitable location for the Before Takeoff checks, or “run-up,” ensuring you have space to stop safely and that prop wash does not interfere with other aircraft. Position the airplane into the wind to improve airflow over the engine and reduce wind effects during run-up.
Complete the Before Takeoff checklist, then taxi up and hold short of the runway, stopping just before the double yellow lines separating the taxiway from the runway. If operating from a tower-controlled airport, contact the tower for takeoff clearance.
Takeoff
Once cleared, taxi onto the runway, set the transponder to altitude encoding, and switch on the landing light. Confirm the mixture is set appropriately (full rich below 3,000 feet). Align with the runway centerline and smoothly apply full throttle, keeping your hand on the throttle throughout takeoff and initial climb.
Monitor engine instruments for green indications and verify airspeed is correct. If anything seems abnormal, reduce power to idle and abort.
At rotation speed (Vr), gently pull back on the control wheel to lift the nose. Once airborne, adjust the pitch to achieve the best rate of climb (Vy). Relieve control pressure using the trim wheel: push forward for nose-down trim or pull back for nose-up trim. Trim neutralizes the force on the control wheel so the aircraft maintains airspeed without continuous manual input.
After climbing at least 1,000 feet AGL, you may transition to a cruise climb by lowering the nose slightly and trimming to maintain the desired airspeed.
Remember:
Whenever airspeed changes, adjust trim accordingly.
Straight-and-Level Flight
To level off at a target altitude, begin the transition about ten percent of your vertical speed below your desired altitude. Apply forward pressure to the control wheel to maintain level attitude by referencing the nose and wings against the horizon. Allow the aircraft to reach cruise speed and adjust power to maintain it. Remove forward control pressure with nose-down trim.
Maintain a mental reference of nose and wing positions for each power setting to return to straight-and-level flight easily.
Turns
Initiate turns by banking the aircraft in the desired direction using the control wheel. Aileron deflection raises the inside wing and lowers the outside wing to create lift for the turn. Check for traffic before initiating a turn.
Shallow Turns (<20°):
Maintain aileron deflection. Adverse yaw may occur; apply rudder pressure on the inside of the turn to coordinate. The inclinometer (turn coordinator) should show the ball centered.
Medium Turns (20–45°):
Once the desired bank is achieved, neutralize aileron pressure to prevent overbanking. Adverse yaw decreases, allowing rudder pressure to be relaxed.
To maintain altitude during turns, increase backpressure slightly to increase the angle of attack and compensate for lift redirected sideways.
Tip:
Think in terms of applying or releasing pressure rather than pushing or pulling controls. Experienced pilots use subtle inputs.
Climbs
From level flight, apply full throttle smoothly and raise the nose gently to achieve desired climb airspeed (cruise climb or Vy). Adjust nose position if airspeed is too high or low.
Use visual references (cowling and wingtips relative to the horizon) or the attitude indicator to maintain the correct climb. Once stabilized, trim to relieve control pressure.
To level off, lower the nose to a straight-and-level attitude about ten percent of vertical speed below your target altitude. Increase power to cruise and trim as needed (nose-down trim likely required).
Descents
Reduce power to begin a descent. If reducing below the green arc on the tachometer, apply carburetor heat. Adjust pitch to control airspeed while maintaining descent rate.
To increase descent rate: reduce power
To decrease descent rate: add power
To increase airspeed: lower nose
To decrease airspeed: raise nose
Record pitch and power settings for various descent profiles to “fly by numbers” and reestablish rates and speeds easily. To return to level flight, start leveling ten percent of vertical speed above target altitude, adding power and returning the nose to a level attitude.
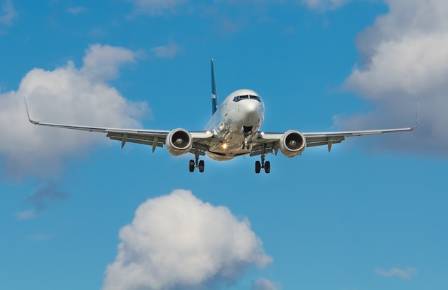
Landing
Reduce power and pitch to gradually slow the aircraft. Once within the flap operating range (white arc), deploy 10° of flaps. Additional increments follow standard approach procedure (10° on base leg, final 10° on short final). Maintain stabilized airspeed and trim for final approach.
As flaps are extended, the nose may pitch up; apply slight forward pressure as needed. Minor corrections should be smooth: if too low, add power; if too high, reduce power.
Visualize your aiming point along the runway to maintain a consistent glide path. When close to touchdown, reduce power to idle and gradually increase backpressure to perform the flare. The main wheels should contact first, with the nosewheel settling gently.
Remember:
Keep the airplane aligned with the runway centerline using ailerons and rudder. Maintain slight backpressure during rollout and apply brakes evenly with toes on the top pedals to avoid veering. Follow the taxiway to exit the runway, then complete the After Landing checklist.
Taxi to your parking position, complete the Shutdown checklist, and you have successfully completed Flight One.
Each flight is followed by an instructor debrief. Flight One covers a large amount of new material, so review carefully before proceeding to Flight Two, which introduces communication procedures and instrument-based flight along with a review of Flight One skills.